Advanced
Jul 7, 2024
Creating an e-commerce cart and reserving items with Supabase in FlutterFlow

Introduction
Managing a cart in an e-commerce app is a fundamental feature that is necessary for a functional store & a good user experience. In this blog, we'll cover how to create a cart for a ticketing app in FlutterFlow using Supabase. Additionally, we'll introduce an advanced feature for reserving items during the checkout process to prevent double bookings. If you're interested in implementing this reservation system, our complete solution is available on the FlutterFlow marketplace.
Feature overview
We want to create a versatile cart that can be used in any typeof app, whether you are hosting restaurants & cafes or event creators, this cart will be powerful enough to suit your needs. Here's a short demo of what the cart can do:
Feature overview.
Cart management in FlutterFlow
To manage a cart in FlutterFlow, we need to use an App State.For this tutorial, w'll create a cart for a ticketing app where users can buy tickets for various events. The event in our example has three ticket options: "General Admission", "VIP", and "Backstage". Users can add multiple tickets of each type to their cart.
Setting up the database
Tickets table: contains basic information about the tickets.
Purchased tickets table: stores purchased tickets and links to the tickets table to track ticket information.
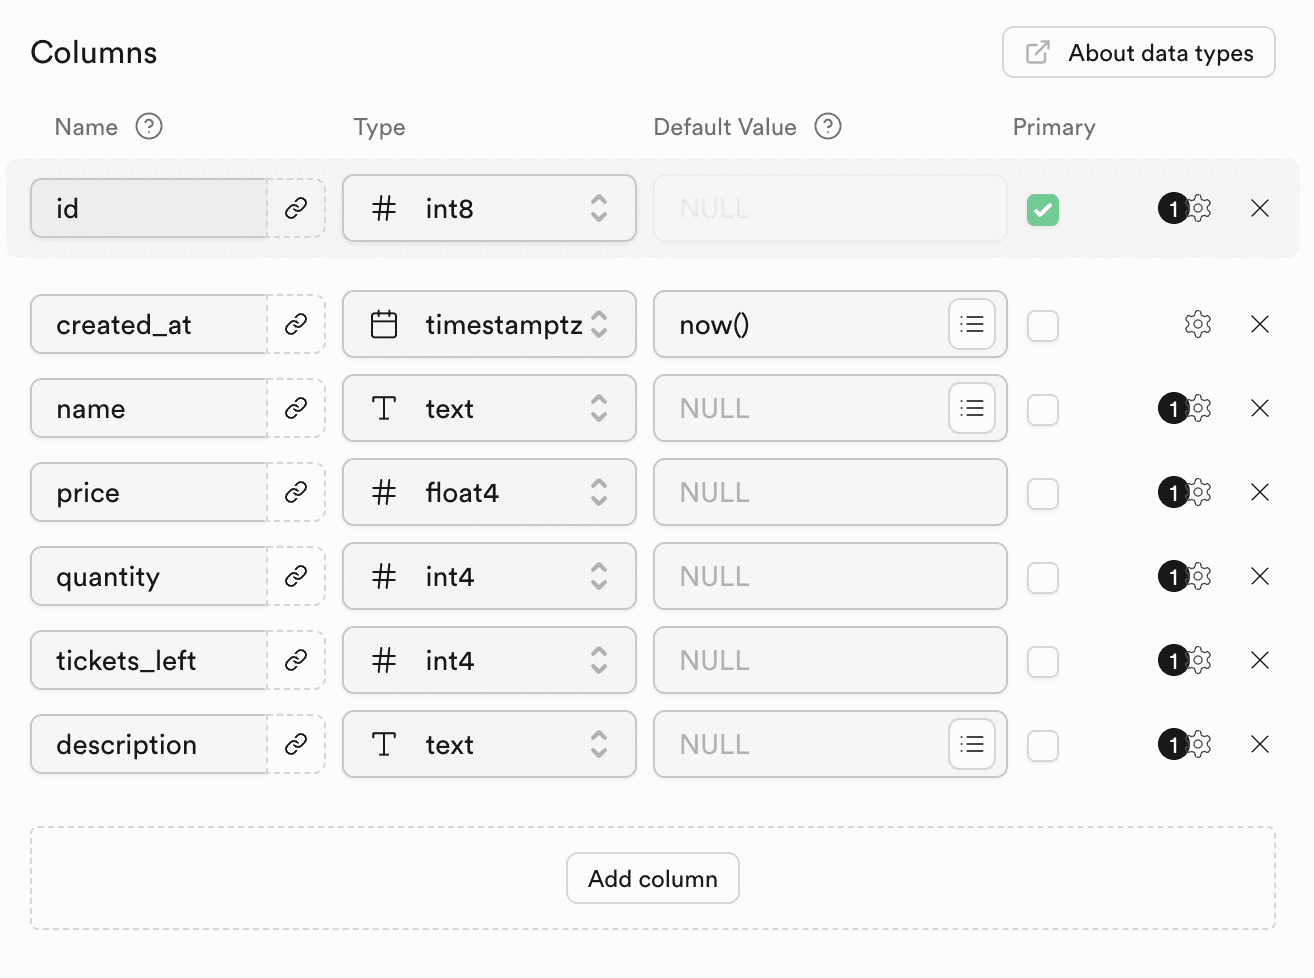
Tickets table in Supabase.
Creating the cart data type
We need a custom data type to manage cart items.This data type will include key fields such as ticket name and the number of ticket variants in the cart. Her's an example data type for the ticket cart:
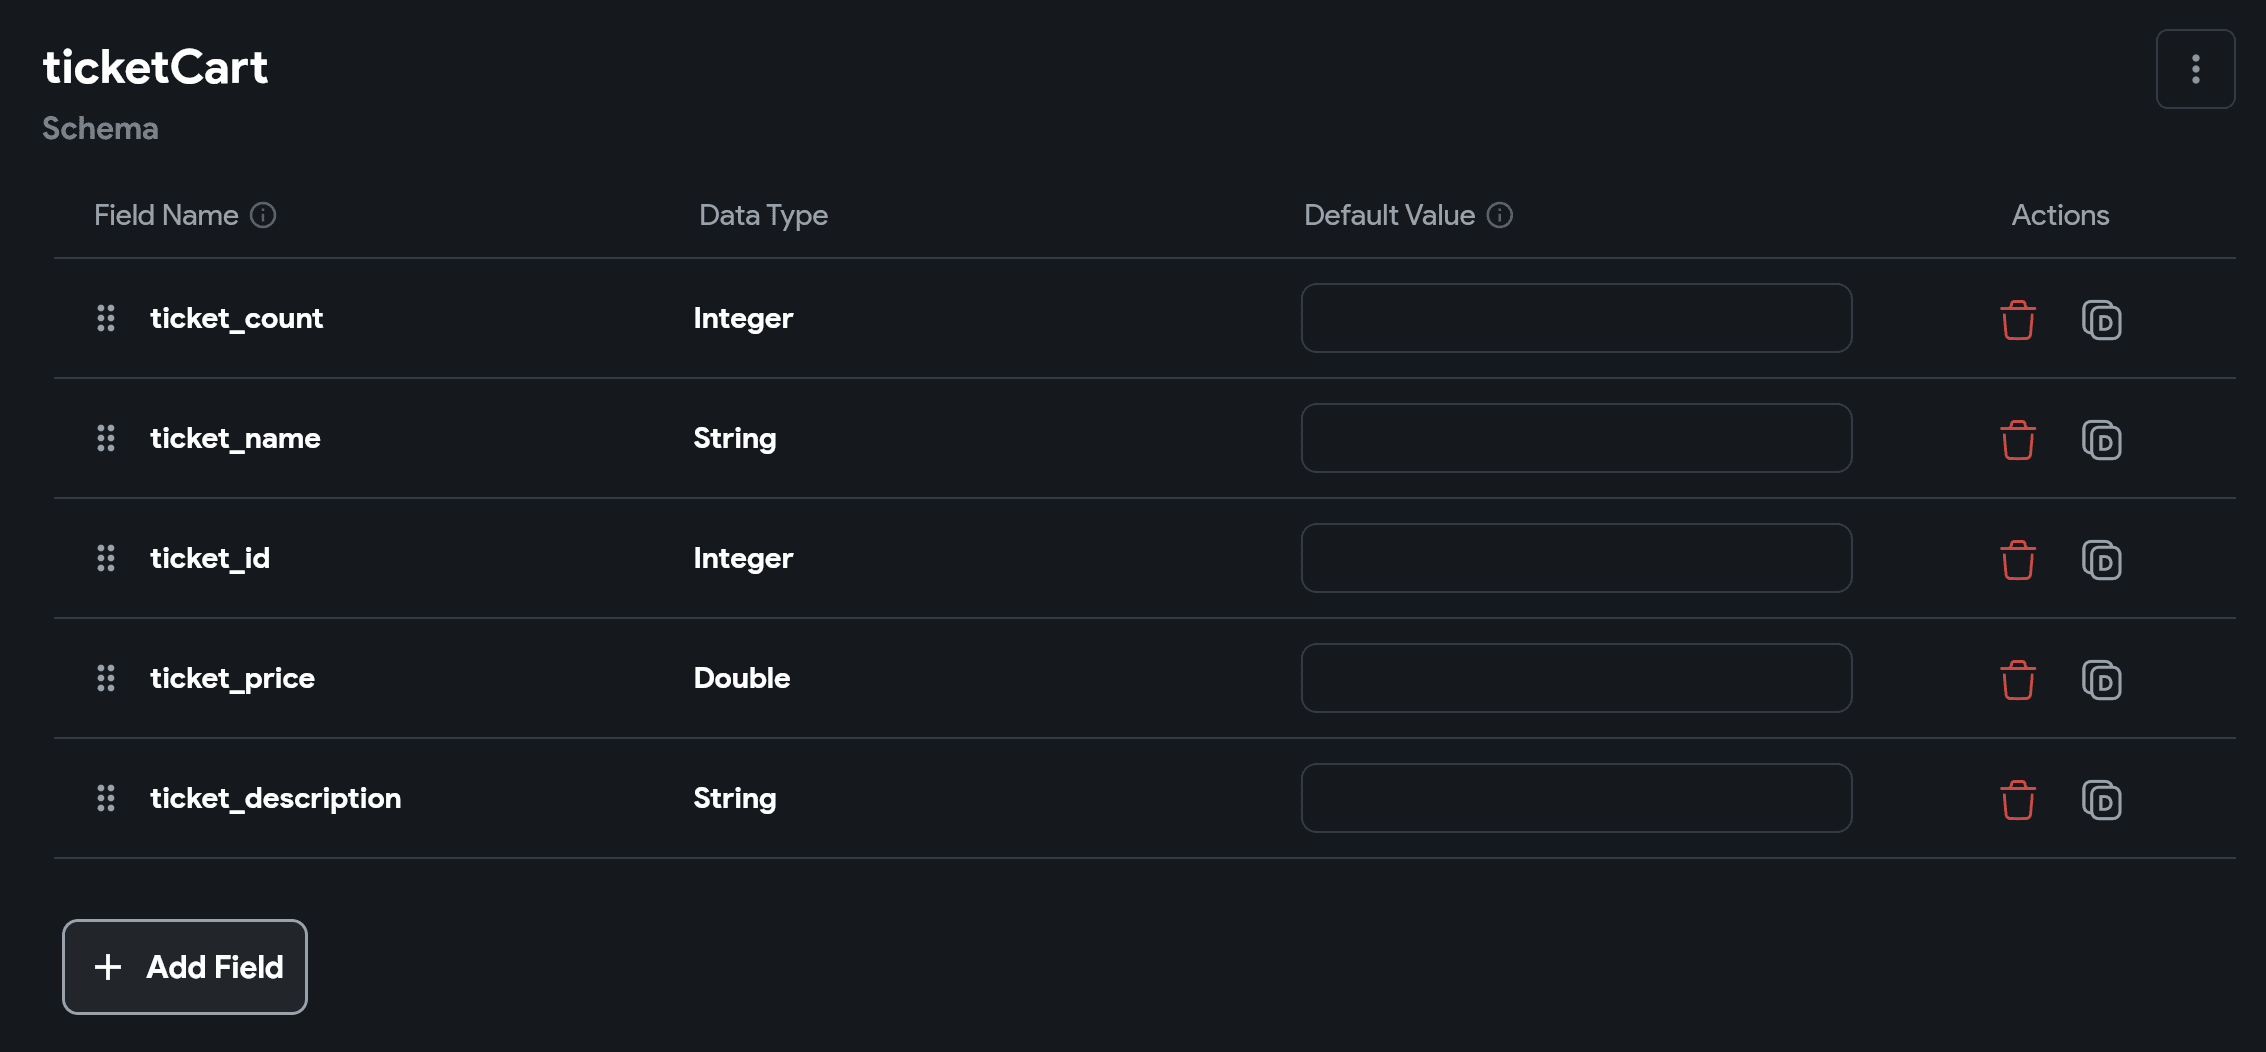
Cart custom data type for the ticketing niche.
Managing the app state
Create an app state variable: define an App State variable of type list<ticketCart>. This variable will store the cart data.
Preload data: before users add tickets to the cart, preload data into the App State variable. This lets us simply update the ticket_count field when users press the "ú+" or "-" icons.
Track cart totals: use additional AppState variables to track the total amount in the cart and the number of tickets in the cart.
Adding tickets to the cart
When a user presses the "+" or "-" icon next to a ticket type, update the field "ticket_count" for the corresponding ticket in the App State variable.
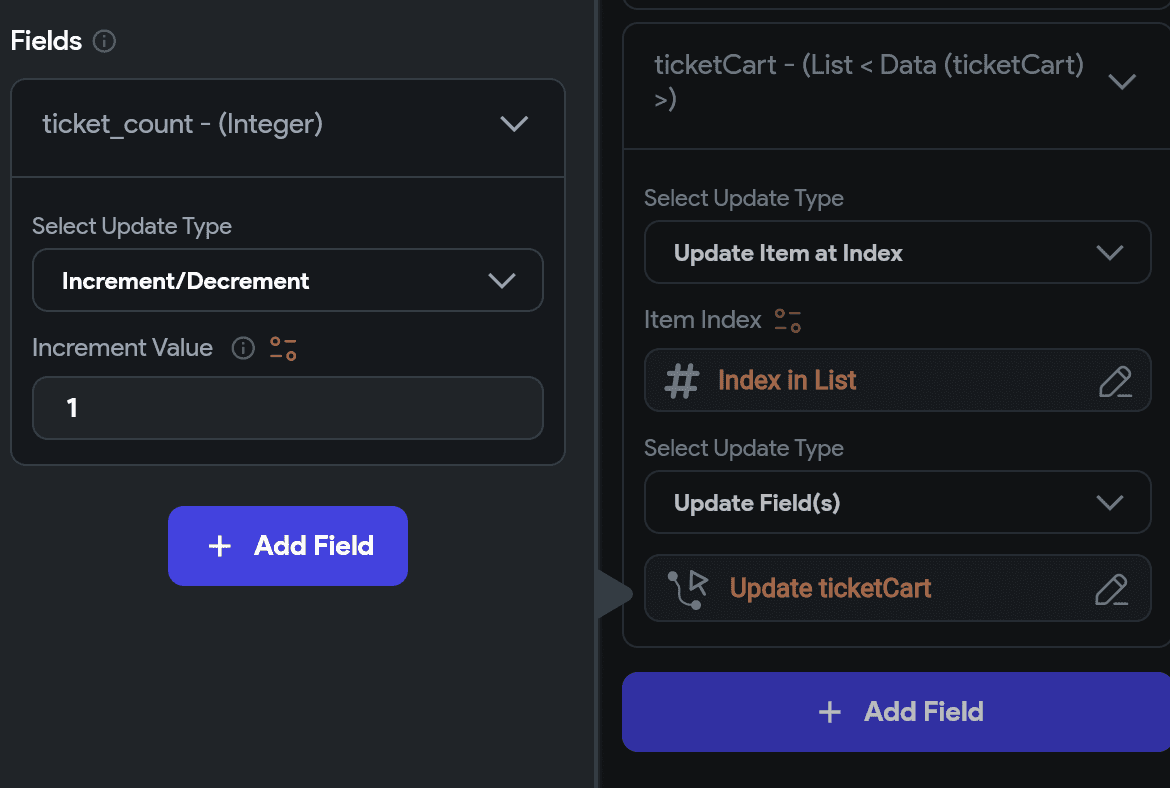
Increment ticket_count for the appropriate ticket when the user clicks on the plus icon.
This way we keep track of each variant separately enabling us to have full control over the cart content.
Processing purchases
With all ticket data ready in the App State, create new records in the purchased_tickets table. Make sure to link to the tickets inside the AppState. Linking the purchased ticket to the original ticket is key to getting information about the purchased ticket later on.
Now that a ticket has been purchased, make sure that the ticket counts and related information are accurately reflected in the database.
Advanced feature: reserving items during checkout
To prevent double bookings, we can implement a reservation system:
Reserve items: when a user starts the checkout process (e.g., adding payment details), reserve the tickets by updating the tickets_left field in the tickets table.
Time-limited reservations: add a time limit to the checkout session. Use a cron job to release reserved tickets if the user does not complete the purchase within the allotted time.
Returning unused tickets: if the app is closed or the time expires without completing the purchase, return the reserved tickets to the available inventory.
Implementing the reservation system
This should be done on the backend. The frontend should never take care of sensitive things like this as various things can happen to the user while in the checkout process – their phone might go out of battery, they might lose signal, etc.
Moving everything to the backend makes this very safe and reliable. We have done exactly that in our marketplace item using cron jobs, RPC functions and database triggers.
Conclusion
Implementing a cart and reservation system in your FlutterFlow app is key to actually making an app with an e-comm purchasing feature. In this guide we are using Supabase for backend management, but any backend could be used and the implementation steps would be identical. For a complete solution, including advanced reservation features, check out our marketplace item. With the marketplace item, you get all the documentation on it works as well as all the backend code and operations.